
Last updated: May 21, 2026
Quick Answer: The most common mistakes when building a metal kit include skipping surface preparation, using the wrong adhesive, forcing misaligned parts, and painting without a primer coat. These errors are easy to make and surprisingly hard to fix after the glue dries — but every one of them is preventable with the right preparation and tools before you start.
Key Takeaways
- Always clean and degrease metal parts before gluing or painting — oils from your hands will cause adhesive and paint to fail.
- Use a two-part epoxy or cyanoacrylate (CA) glue rated for metal; standard plastic model cement will not bond metal surfaces.
- Warping happens most often when builders apply heat or force to parts that need patient repositioning instead.
- A self-healing cutting mat, needle-nose pliers, and a set of quality files are the minimum tools you need before starting.
- Prime metal surfaces before painting to prevent chipping; metal-specific primers bond far better than standard spray primers.
- Metal kits generally take 30–80% longer to complete than comparable plastic kits, depending on part count and finish quality.
- Beginners should start with small, low-part-count kits (under 50 pieces) before attempting complex architectural or vehicle models.
- Workspace safety matters: metal burrs and sharp edges are a real injury risk, and some adhesives require ventilation.
- Mistakes made after gluing are fixable, but recovery requires patience, the right solvent, and sometimes replacement parts.
- Metal kits are worth the extra effort for builders who want a durable, display-quality finished model.
What Are the Most Common Mistakes Beginners Make When Building Metal Kits?
The most common mistakes when building a metal kit fall into three categories: poor preparation, wrong materials, and impatience. Beginners tend to underestimate how different metal is from plastic, and that assumption causes most of the problems.
Here are the errors that come up most often:
- Skipping part cleaning. Metal parts arrive coated in machine oil or oxidation. Glue and paint bond poorly to these surfaces.
- Using the wrong adhesive. Plastic model cement is chemically incompatible with metal. It will not cure properly.
- Forcing parts together. Metal does not flex like plastic. Forcing a misaligned joint bends the part permanently.
- Painting without primer. Paint applied directly to bare metal chips within days, especially on handled display pieces.
- Ignoring the instructions. Metal kits often have a specific build sequence. Skipping steps can make later parts impossible to fit.
- Working without proper lighting. Small metal tabs and alignment notches are easy to miss in dim conditions.
- Not dry-fitting first. Assembling without a test fit first is the single fastest way to end up with a crooked model.
💡 Quick rule: If a part doesn’t seat easily with light finger pressure during a dry fit, stop and find out why before adding any adhesive.
How Do I Avoid Warping or Bending Metal Parts During Assembly?
Warping in metal model kits happens when a builder applies uneven pressure, uses excess heat, or stores parts improperly before assembly. The good news: most warping is preventable, and mild bends are correctable.
Prevention steps:
- Store flat parts flat. Don’t stack heavy items on top of kit sheets before you’re ready to work.
- Separate parts from the sprue (the metal sheet frame) using flush-cut pliers or a sharp hobby knife — never twist or snap them free.
- Apply pressure evenly when seating parts. Use a flat surface as a reference plane and press straight down.
- Avoid using a heat gun on thin metal parts. Heat spreads unevenly through metal and can cause permanent distortion.
If a part is already slightly bent:
- Place it on a flat steel or glass surface and apply gentle, even pressure with a flat tool (a wooden craft stick works well).
- For thicker parts, a small pair of flat-jaw pliers wrapped in masking tape can carefully re-straighten a bend without scratching the surface.
- Severe bends in thin brass or steel parts are usually not fully recoverable. Contact the manufacturer for a replacement piece before proceeding.
Best Glue or Adhesive for Metal Model Kits
The best adhesive for metal model kits is either a two-part epoxy or a metal-rated cyanoacrylate (CA/super glue). Standard plastic model cement is not an option — it works by chemically melting plastic surfaces together, a process that simply doesn’t apply to metal.
| Adhesive Type | Best For | Cure Time | Notes |
|---|---|---|---|
| Two-part epoxy (e.g., Araldite) | Structural joints, heavy parts | 5–90 minutes | Strong, gap-filling, repositionable before cure |
| Cyanoacrylate (CA/super glue) | Small, tight-fitting joints | 10–60 seconds | Fast but brittle; use gel version for better control |
| Epoxy putty | Filling gaps, irregular surfaces | 1–4 hours | Sandable after cure; good for repairs |
| Solder (with iron) | Permanent, professional-grade joins | Immediate | Requires skill; not beginner-friendly |
Choose two-part epoxy if your kit has large structural pieces or if you need a few minutes to align parts before the bond sets.
Choose CA glue if the joints are tight and pre-aligned, and you need a fast, clean bond on small detail parts.
Always apply adhesive sparingly. Excess glue squeezes out of joints and is very difficult to remove cleanly from metal surfaces.
Tips for Painting Metal Model Kits Without Chipping
Paint chipping on metal models is almost always caused by skipping the primer step or using a primer not designed for metal. Metal surfaces are non-porous and naturally smooth, which gives paint very little to grip.
Step-by-step painting process for metal kits:
- Clean the surface. Wipe all parts with isopropyl alcohol (90%+) to remove oils and residue.
- Apply a metal-specific primer. Products like Vallejo Metal Color Primer or Tamiya Fine Surface Primer (for metal) are good starting points. Apply in thin, even coats.
- Let the primer cure fully. Don’t rush this. 24 hours is a safe minimum before adding color coats.
- Apply thin color coats. Two or three thin coats beat one thick coat every time. Thick coats pool in recesses and peel faster.
- Seal with a clear topcoat. A matte or gloss varnish adds a protective layer and dramatically reduces chipping on handled pieces.
🎨 Pro tip: If you’re airbrushing, add a drop of flow improver to your paint mix. Metal surfaces cause paint to bead up more than plastic does, and flow improver helps it lay flat.
Common Tools You’ll Definitely Need for Metal Model Building
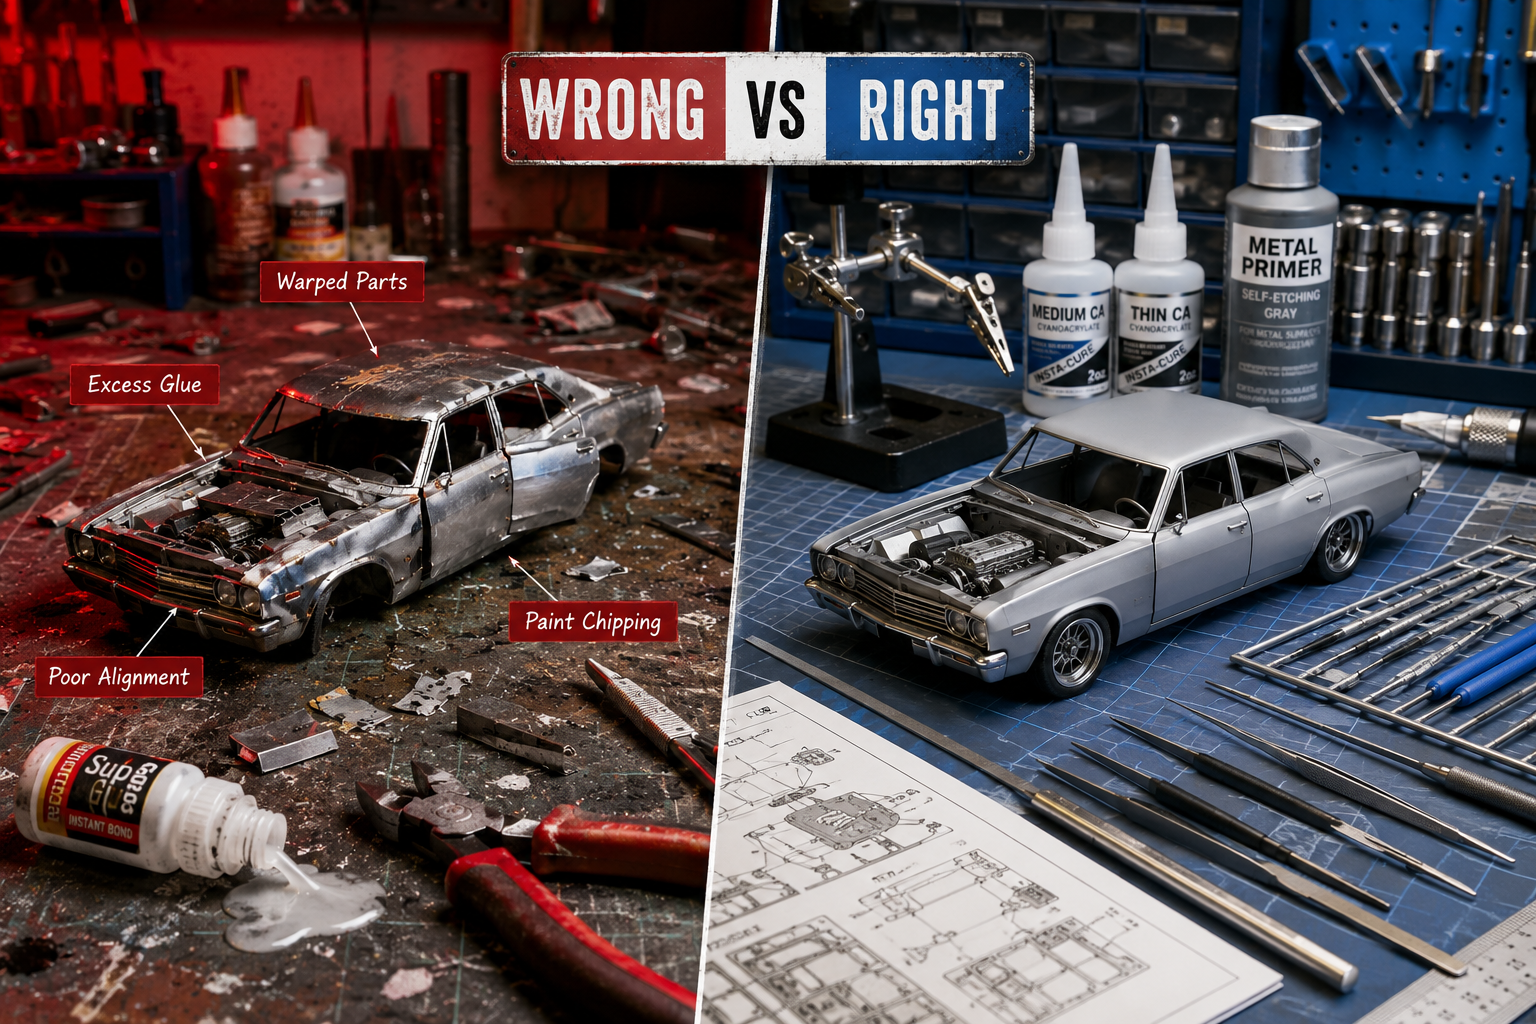
You don’t need a professional workshop to build metal kits, but you do need the right tools. Using the wrong tools — or improvising with kitchen scissors — is one of the most common mistakes when building a metal kit.
Minimum tool kit for beginners:
- Flush-cut pliers — for removing parts from metal sprues cleanly
- Needle-nose pliers — for bending tabs and holding small parts
- Set of needle files — for smoothing burrs and fitting adjustments
- Self-healing cutting mat — protects your work surface and provides a flat reference plane
- Tweezers — fine-tip, for placing small parts accurately
- Hobby knife with fresh blades — for trimming and scoring
- Magnifying glass or head-mounted loupe — for small detail work
- Small clamps or clothespins — for holding glued joints while they cure
Optional but useful:
- Pin vise and drill bits (for adding custom details or fixing broken tabs)
- Sanding sticks in multiple grits
- Toothpicks (for applying small amounts of adhesive precisely)
How Much Do Professional Metal Model Building Tools Actually Cost?
A functional beginner tool set for metal model building typically costs between $40 and $120 USD in 2026, depending on brand quality. Professional-grade sets used by experienced modelers can run $200–$500+, but that level of investment isn’t necessary to produce excellent results.
Approximate cost breakdown:
| Tool | Budget Option | Mid-Range | Professional |
|---|---|---|---|
| Flush-cut pliers | $8–$12 | $20–$35 | $50–$80 |
| Needle files (set) | $6–$10 | $15–$25 | $40–$70 |
| Tweezers (set) | $5–$8 | $12–$20 | $30–$50 |
| Cutting mat | $8–$15 | $20–$35 | $40–$60 |
| Hobby knife + blades | $5–$10 | $15–$25 | $30–$50 |
Budget tools work fine for occasional builders. If you plan to build more than two or three kits per year, mid-range tools pay for themselves quickly in durability and precision.
Are Metal Kits Harder to Build Than Plastic Model Kits?
Yes, metal model kits are generally harder to build than plastic kits, primarily because metal is less forgiving of errors and requires different adhesives, tools, and surface preparation. That said, difficulty depends heavily on part count and kit complexity.
Key differences:
- Adhesive: Plastic kits use cement that bonds quickly and is forgiving of small gaps. Metal requires epoxy or CA glue, both of which demand more precision.
- Part removal: Plastic sprues snap or cut easily. Metal sprues require flush-cut pliers and often leave small burrs that need filing.
- Painting: Plastic holds primer well with minimal prep. Metal requires degreasing and metal-specific primer.
- Flexibility: Plastic parts can be gently flexed to fit. Metal parts bend permanently if forced.
- Weight: Finished metal models are heavier, which means joints need to be stronger and cure times more respected.
For a builder who has completed several plastic kits, the transition to metal is manageable. For an absolute beginner with no modeling experience, starting with plastic first is a reasonable approach.
What Metal Model Kits Are Good for Absolute Beginners?
Beginners should look for metal kits with fewer than 50 parts, pre-cut components (no laser-cutting required from the builder), and clear English instructions with numbered diagrams. Brands like Metal Earth, Fascinations, and Piececool produce entry-level kits that fit these criteria well.
Good starting points in 2026:
- Metal Earth standard series — single-sheet kits with 20–40 parts; takes 1–3 hours; widely available
- Piececool puzzle kits — color-coated steel with snap-together tabs; no glue required on many models
- UGears metal series — mechanical models with moving parts; slightly more complex but very well-documented
Avoid multi-sheet architectural kits (like the Eiffel Tower or Empire State Building) as a first project. These have 100–200+ parts and require patience that comes with experience.
What Kind of Workspace Do I Need to Build Metal Model Kits Safely?
A safe workspace for metal model kit building needs good lighting, a flat stable surface, adequate ventilation (especially if using adhesives or spray primer), and a way to contain small parts and metal shavings. You don’t need a dedicated room — a cleared kitchen table or a hobby desk works fine.
Workspace checklist:
- ✅ Bright, directed light (a desk lamp with a daylight bulb is ideal)
- ✅ Flat, stable surface covered with a cutting mat
- ✅ Ventilation — open a window or use a small fan when using adhesives or spray paint
- ✅ A tray or shallow box to contain small parts and prevent them rolling off the table
- ✅ Paper towels and isopropyl alcohol for cleanup
- ✅ A dedicated container for metal shavings and sharp offcuts (don’t let these end up in the trash loosely)
Keep pets and children away from the workspace during active building. Metal burrs and small parts are a swallowing and puncture hazard.
What Health and Safety Precautions Should I Take When Working With Metal Models?
Metal model building carries specific physical risks that plastic modeling does not. Sharp edges, metal shavings, adhesive fumes, and spray paint vapors are the main concerns.
Safety precautions:
- Wear safety glasses when cutting parts from metal sprues. Small metal fragments can flick unpredictably.
- Use cut-resistant gloves when handling large, freshly cut metal parts with sharp edges.
- Work in a ventilated area when using CA glue, epoxy, or any spray product. CA glue fumes are an eye and respiratory irritant.
- Dispose of metal shavings carefully. Wrap them in tape before placing in the trash to prevent punctures.
- Wash hands thoroughly after handling metal parts, especially if you’ve been filing or sanding, as metal dust can be a skin irritant.
If you use spray primer or paint indoors, consider a small spray booth with a built-in filter. These are available for under $80 and make a significant difference in air quality.
How Do I Fix Mistakes After I’ve Already Glued Metal Pieces Together?
Fixing a gluing mistake on a metal kit is possible but requires patience and the right approach depending on the adhesive used. Acting quickly gives you the best chance of a clean recovery.
For CA glue (super glue):
- Apply a small amount of acetone (nail polish remover) to the joint using a toothpick or cotton swab. Acetone dissolves cured CA glue without damaging most metal surfaces.
- Wait 2–5 minutes, then gently work the joint apart with a flat tool.
- Clean both surfaces with isopropyl alcohol before re-gluing.
For two-part epoxy:
- Fully cured epoxy is very difficult to dissolve chemically. Mechanical removal (carefully scraping or filing) is usually the only option.
- Heat (a heat gun on low setting, applied briefly) can soften epoxy enough to separate parts, but risks warping thin metal.
For misaligned but not yet fully cured joints:
- If you catch it within the working time of the adhesive, gently reposition the part. Most epoxies have a 5–30 minute working window.
⚠️ Important: If a structural part breaks during recovery, contact the kit manufacturer. Many brands sell individual replacement sheets or offer replacement parts at low cost.
How Long Does a Typical Metal Model Kit Take to Complete?
A simple metal model kit (20–50 parts) takes most builders between 1 and 4 hours to complete. Mid-complexity kits (50–150 parts) typically take 6–15 hours spread across multiple sessions. Large, detailed kits can take 20–60+ hours depending on the builder’s experience and finishing standards.
Time estimates by kit type:
| Kit Complexity | Part Count | Estimated Build Time |
|---|---|---|
| Beginner (single sheet) | 20–50 | 1–4 hours |
| Intermediate | 50–150 | 6–15 hours |
| Advanced (multi-sheet) | 150–300+ | 20–60+ hours |
| Professional/competition | 300+ | 60–200+ hours |
These estimates assume assembly only. If you’re priming, painting, and applying weathering effects, add 30–80% more time depending on the level of finish you want.
Are Metal Model Kits Worth the Extra Effort Compared to Plastic?
For builders who want a durable, display-quality finished piece with a premium look and feel, metal kits are absolutely worth the extra effort. For casual builders who want a relaxing weekend project, plastic kits remain the easier and faster choice.
Metal kits are worth it if you:
- Want a finished model that will last decades without yellowing or warping
- Enjoy the challenge of working with a more demanding material
- Plan to display the model in a prominent location where durability matters
- Are interested in eventually advancing to soldering or scratch-building
Plastic kits are the better choice if you:
- Are new to modeling and want to learn core skills first
- Want to complete a project in a single weekend
- Are building with children or in an educational setting
- Are primarily interested in the painting and weathering process rather than the assembly
The two are not mutually exclusive. Many experienced modelers build both, choosing the medium based on the specific project.
FAQ
Q: Can I use regular super glue on a metal model kit?
Yes, but use a gel-formula cyanoacrylate (CA) rather than thin super glue. Thin CA runs into joints before you’ve had time to align the parts. Gel CA gives you a few extra seconds of working time and is easier to control on metal surfaces.
Q: Do I need to prime metal model kits before painting?
Yes. Metal surfaces are non-porous and naturally smooth, which means standard paint has very little to grip. A metal-specific primer creates a bonding layer that dramatically reduces chipping and peeling.
Q: What’s the best way to remove burrs from metal parts?
Use a needle file in a smooth, single-direction stroke across the burr. Avoid back-and-forth filing, which can scratch adjacent surfaces. Finish with a fine sanding stick (400–600 grit) for a clean edge.
Q: Can children build metal model kits?
Metal kits are generally recommended for ages 14 and up due to sharp edges, small parts, and adhesive fumes. Younger children should only participate with close adult supervision, and snap-together metal kits (no glue required) are the safest option for that age group.
Q: How do I prevent fingerprints from showing on a finished metal model?
Apply a clear topcoat (matte or gloss varnish) after painting. For unpainted metal finishes, a thin coat of Renaissance Wax or a similar microcrystalline wax creates a protective barrier against oils and fingerprints.
Q: Is it possible to repaint a finished metal model?
Yes. Sand the existing paint lightly with 400-grit sandpaper, clean with isopropyl alcohol, re-prime, and repaint. The process is straightforward as long as the original paint isn’t too thick.
Q: What’s the difference between brass and steel metal model kits?
Brass kits are softer and easier to bend and shape, making them more forgiving for beginners. Steel kits are harder and more durable but require more effort to work with. Many entry-level kits use thin steel (often called “tin plate”), while premium kits use brass or copper.
Q: Do metal model kits rust?
Uncoated steel kits can develop surface rust if stored in humid conditions. Applying a clear varnish or wax after completion prevents this. Brass and copper kits do not rust but may develop a patina over time, which many builders consider desirable.
Q: Can I use a regular craft knife to separate metal parts from the sprue?
A craft knife can score thin metal, but flush-cut pliers are the correct tool for separating parts cleanly. Using only a knife risks bending the part or leaving a jagged edge that requires significant filing.
Q: What should I do if a tab breaks off during assembly?
Tabs are the most common breakage point in metal kits. If the break is clean, a small amount of CA glue can re-attach the tab. If the tab is lost, epoxy putty can fill the joint and be shaped to match the original profile after curing.
Q: How do I store an unfinished metal kit between sessions?
Keep parts in labeled zip-lock bags, separated by build stage. Store the bags flat in a dry environment. Avoid leaving bare metal parts exposed to humidity for extended periods, as surface oxidation will affect paint adhesion.
Q: Are there online communities for metal model builders?
Yes. Forums like Scale Modelers World, Reddit’s r/modelmakers, and dedicated Facebook groups for specific kit brands are active in 2026 and are excellent resources for troubleshooting specific mistakes when building a metal kit.
Conclusion: Build Smart, Not Just Fast
The most consistent pattern among builders who struggle with metal kits is not a lack of skill — it’s a lack of preparation. The mistakes when building a metal kit that cause the most frustration (bad bonds, chipped paint, warped parts) are almost entirely front-loaded problems. Fix the preparation, and the assembly takes care of itself.
Actionable next steps:
- Before you buy a kit, assess your current tool kit against the minimum list in this guide. Fill the gaps first.
- Start small. Choose a single-sheet beginner kit for your first metal build, regardless of your plastic modeling experience.
- Dry-fit every part before applying any adhesive. This single habit eliminates the majority of alignment errors.
- Prime before you paint. No exceptions. The 24-hour wait is worth it.
- Join a community. Other builders have solved the exact problem you’re facing. The forums mentioned in the FAQ are a practical resource, not just a social one.
Metal kits reward patience. The builders who produce the best results aren’t necessarily the most talented — they’re the ones who slow down at the steps where it matters most.
Sources
- Vallejo Paints. Metal Color Primer Technical Data Sheet. Vallejo, 2023. www.acrylicosvallejo.com
- Tamiya Inc. Fine Surface Primer Product Information. Tamiya, 2022. www.tamiya.com
- Metal Earth by Fascinations. Assembly Instructions and FAQ. Fascinations Inc., 2024. www.metalearth.com
- Piececool. Product Assembly Guides. Piececool, 2023. www.piececool.com
- Scale Modelers World. Community Forum: Metal Kit Techniques. 2024. www.scalemodelersworld.com